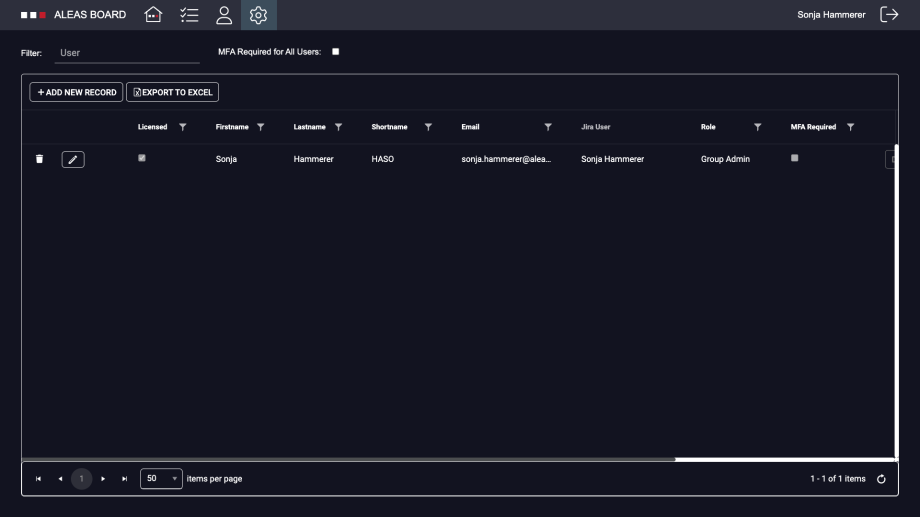
How to set up Jira Sync in ALEAS Board
How to create a WebHook in Jira
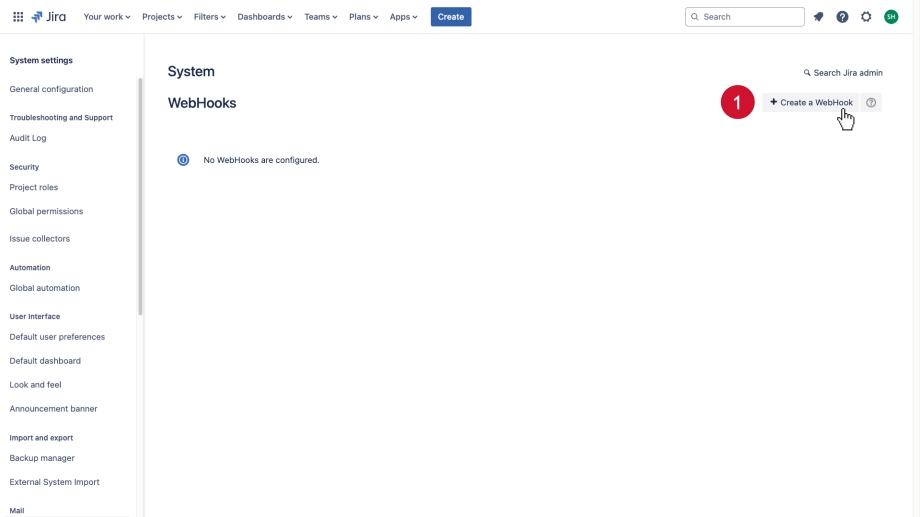
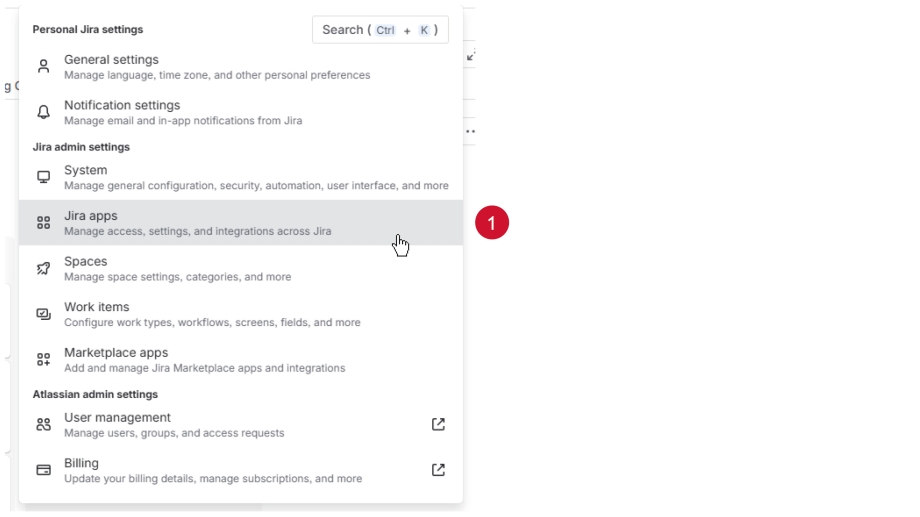
Go to Jira and open the WebHooks menu (Settings → System → WebHooks).
Click the Create a WebHook button.
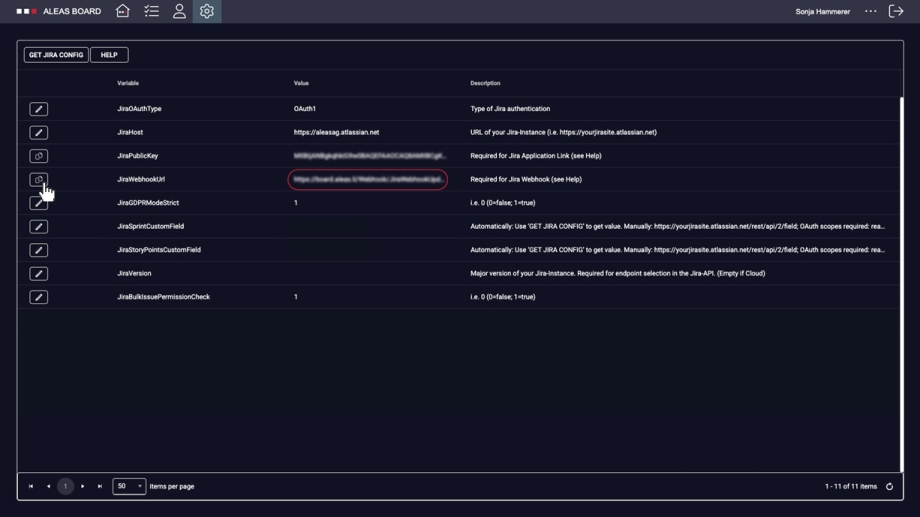
Then go to ALEAS Board and navigate to Settings → Jira.
Copy the WebHook URL.
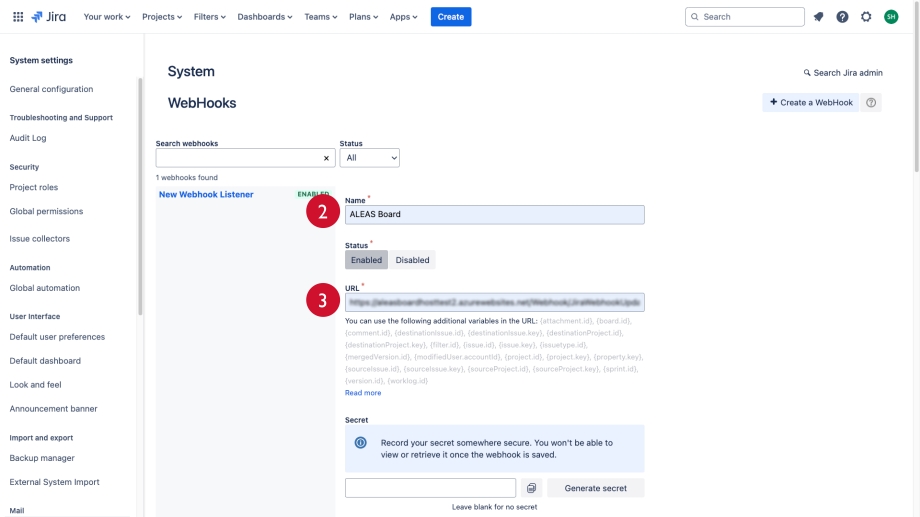
In Jira enter a name for your WebHook, ensure the status is set to Enabled and paste the WebHook URL.
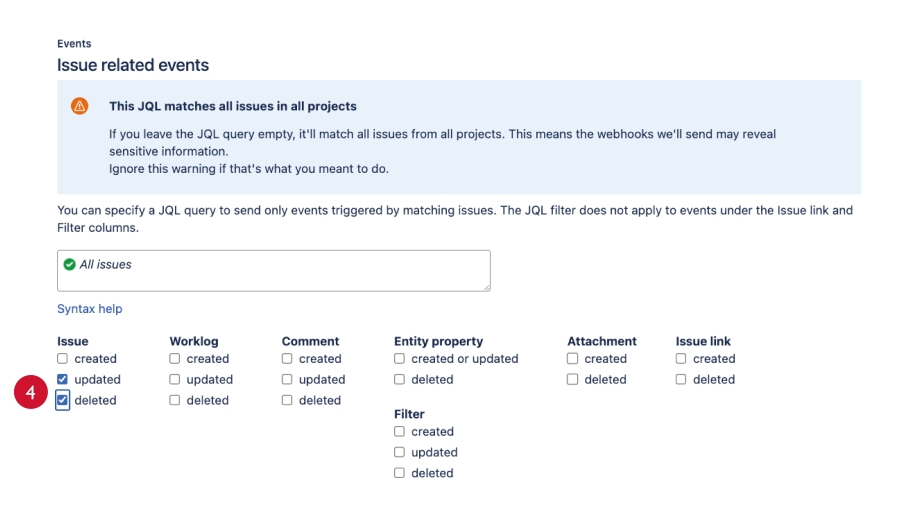
Scroll down to Issue related events → Issue and active updated and deleted.
Click the Create button at the bottom.
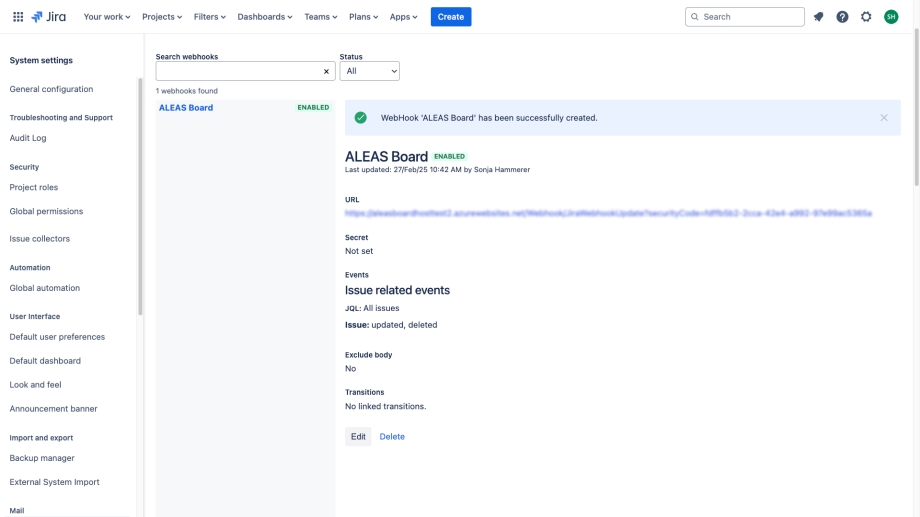
✅ Your WebHook is now set up.
Setup for Jira OAuth1
1) Create an Application Link in Jira
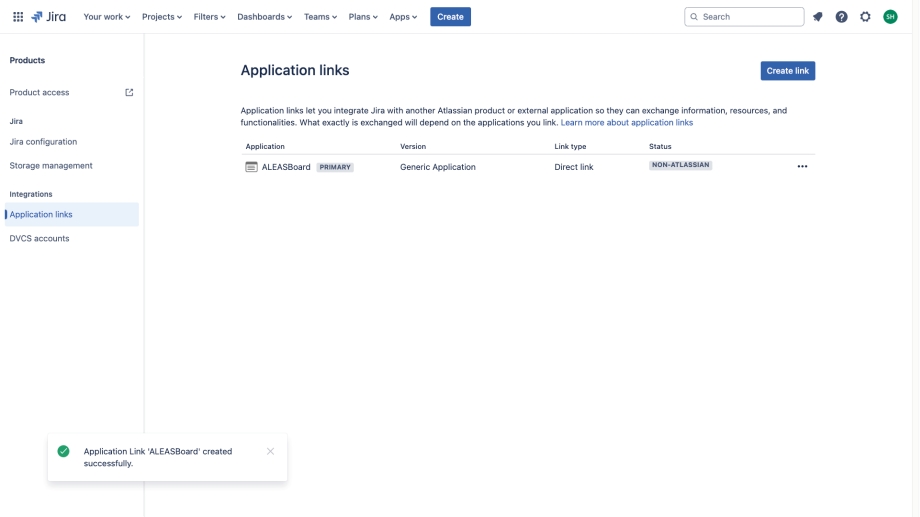
Create Application Link:
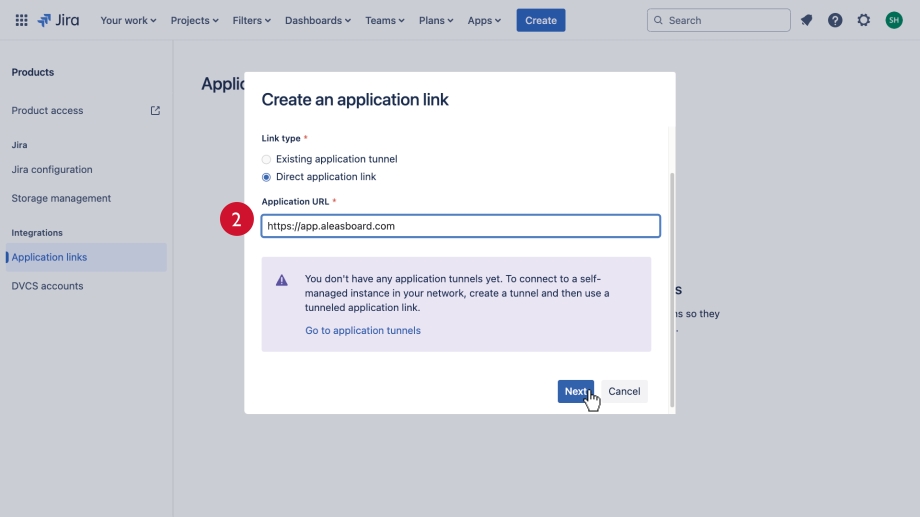
In the dialog box under Application URL, paste the URL of the ALEAS Board instance you are using (e.g., https://app.aleasboard.com), then click Next.
Create Application Link:
In the dialog box under Application URL, paste the URL of the ALEAS Board instance you are using (e.g., https://app.aleasboard.com), then click Next.
Configure Application URL: Check the box next to Use this URL, then click Continue.
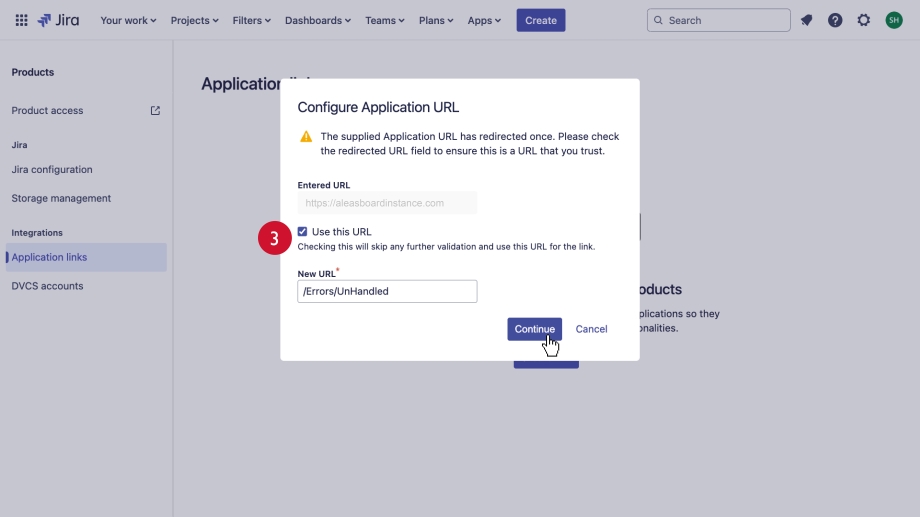
Review Link (Part 1):
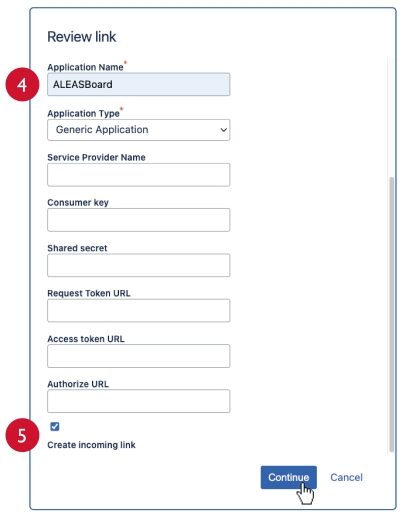
Under Application Name, type ALEASBoard (Note: The name is case-sensitive and must be spelled exactly like this). Check the box at the bottom for Create incoming link. Click Continue.
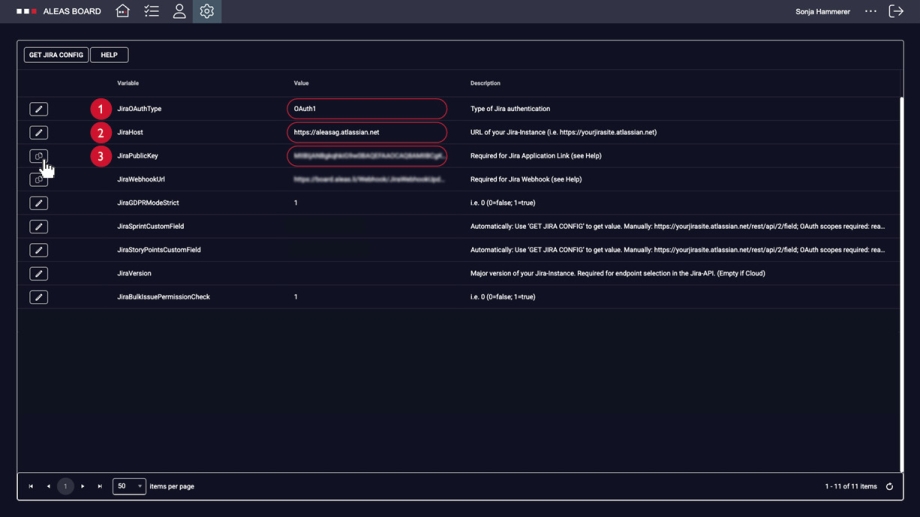
Go to the ALEAS Board and navigate to Settings → Jira.
- Ensure that the JiraOAuthType (first field) is set to OAuth 1.
- In the JiraHost section, enter the URL of your Jira instance (e.g.,
https://yourjirasite.atlassian.net) into the Value field. - Copy the Public Key (by clicking on the button next to JiraPublicKey).
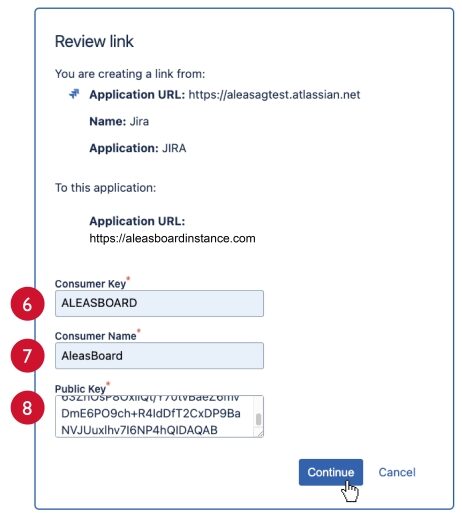
Review Link (Part 2):
In Jira, enter ALEASBOARD under Consumer Key and AleasBoard under Consumer Name. Paste the public key and click Continue.
(Note: The names are case-sensitive and must be spelled exactly like this.)
✅ You have now successfully created an application link.
2) Get Jira Configuration in ALEAS Board
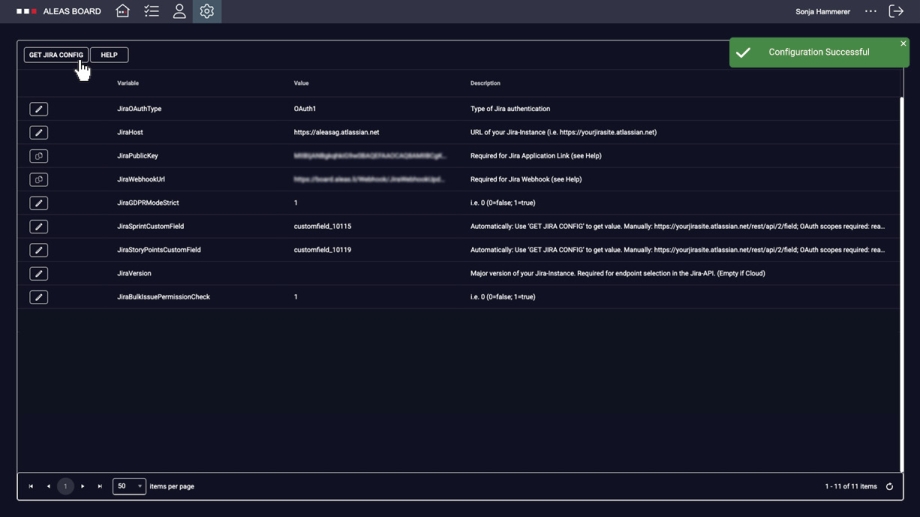
Go to ALEAS Board and open the Jira settings (Dashboard → Settings → Jira).
Click the Get Jira Config button. A green “Configuration Successful” message should appear.
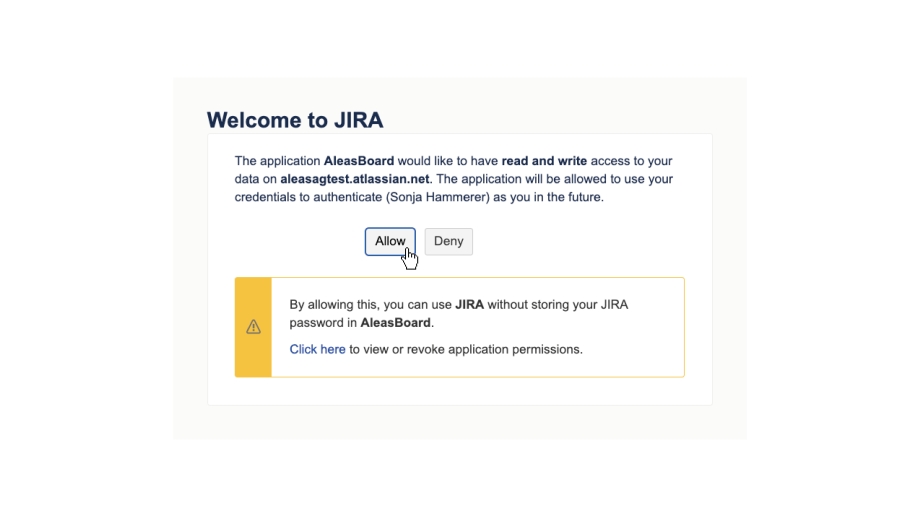
You may need to confirm access to Jira first. If the pop-up window “Welcome to Jira” appears, click Allow, then press the Get Jira Config button again.
✅ The Jira Sync is now established, and the custom field settings should update instantly.
Setup for Jira OAuth2: How to create an Atlassian OAuth 2.0 (3LO) App for ALEAS Board
Step 1: Create a new app
- Go to https://developer.atlassian.com/console/myapps
- Click the button Create to create a new app.
- From the app type dropdown, select OAuth 2.0 integration.
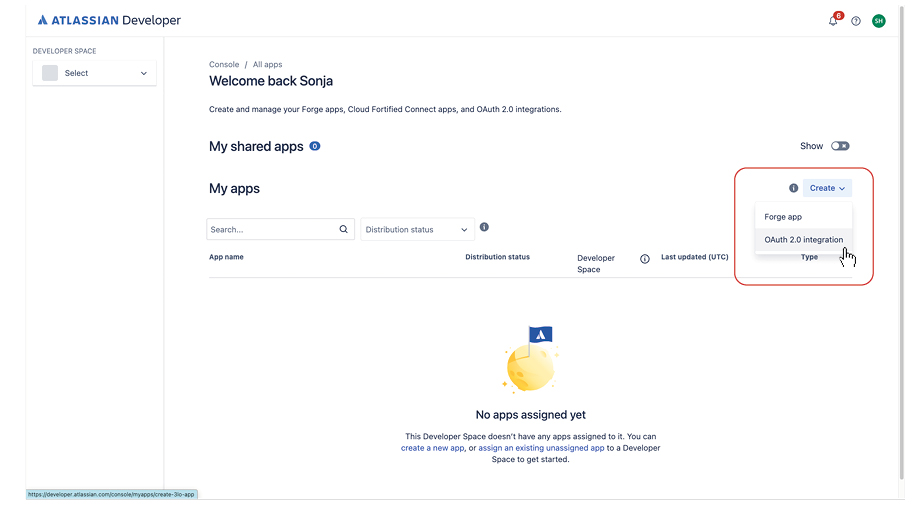
- Enter ALEASBoard as the app name.
- Review and accept the Atlassian Developer Terms.
- Click Create.
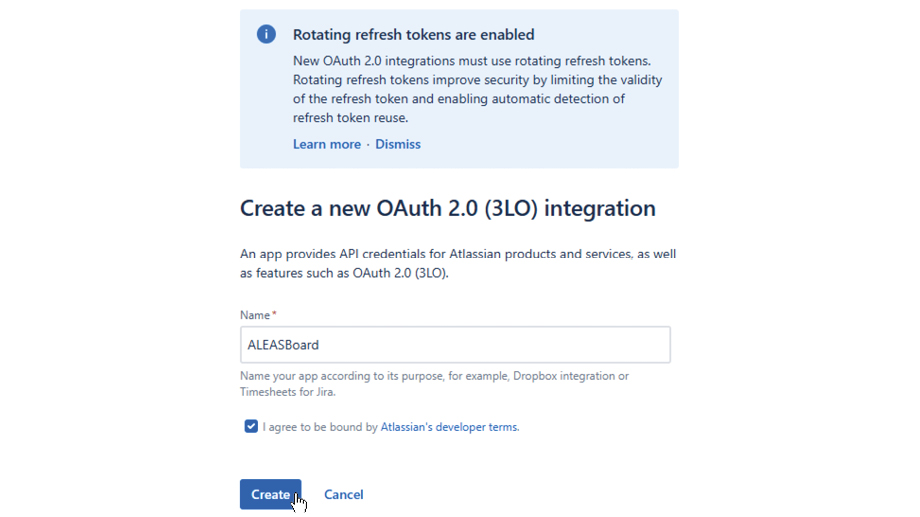
Step 2: Add Jira API permissions
-
In your newly created app, navigate to Permissions.
-
Add the Jira API to your app.
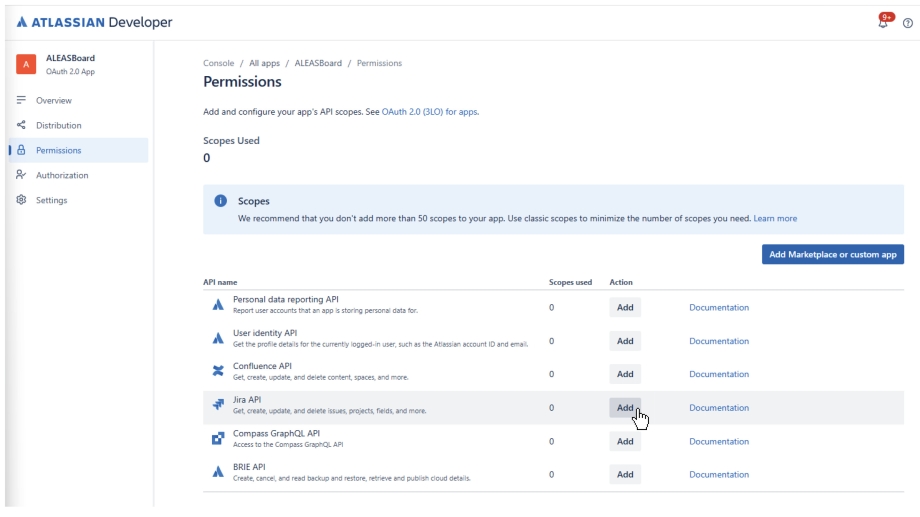
Step 3: Configure Jira API scopes
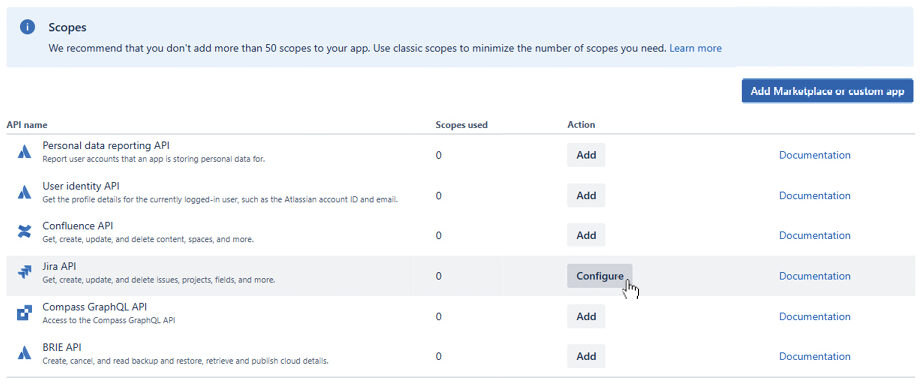
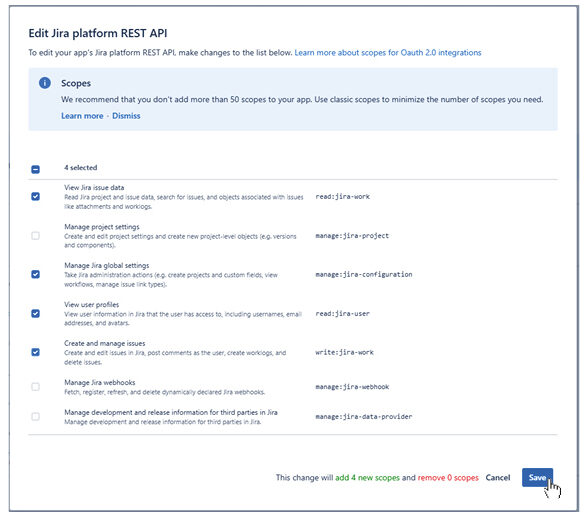
Under Jira platform REST API, edit the scopes.
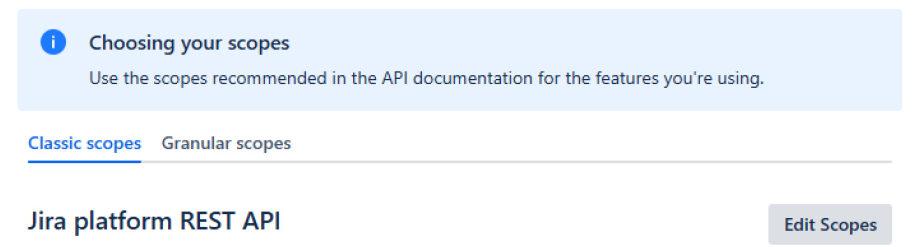
Add the required scopes (as specified for your integration).
✔︎ View Jira issue data
✔︎ Manage Jira global settings
✔︎ View user profiles
✔︎ Create and manage issues
Click Save to apply the changes.
Step 4: Configure OAuth Authorization
-
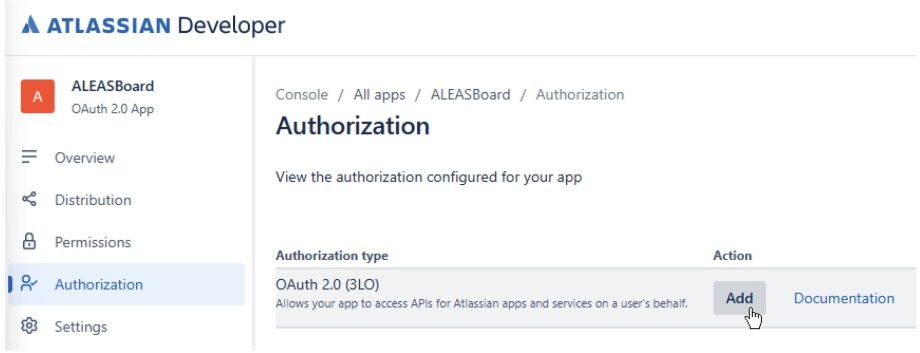
Navigate to the Authorization section.
-
Add OAuth 2.0 (3LO) authorization.
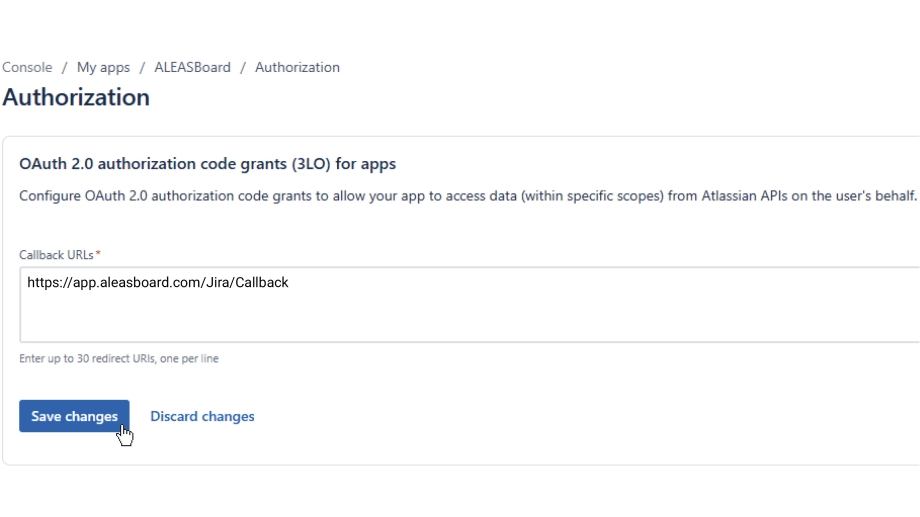
- In the Callback URL field, enter the ALEASBoard instance you are using (for example,
https://app.aleasboard.com), followed by/Jira/Callback. - Then save your changes.
Callback URL Example: https://app.aleasboard.com/Jira/Callback
Step 5: Retrieve client credentials
-
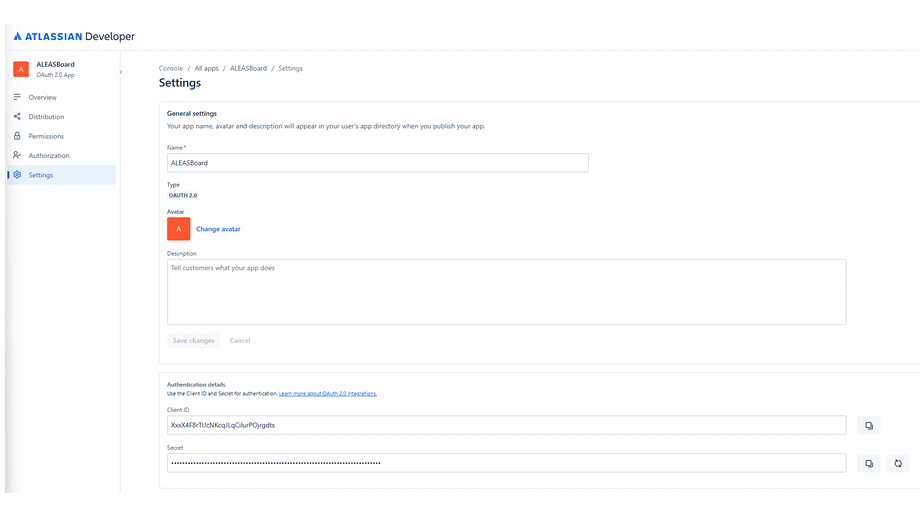
Go to the Settings page of your app.
-
Copy the Client ID and Client Secret.
Step 6: Configure ALEAS Board
- Go to Settings → Jira
- Ensure that the Jira OAuth Type (first field) is set to OAuth2
- Paste the copied values into the fields “Jira OAuth2 Client ID” and “Jira OAuth2 ClientID Secret”
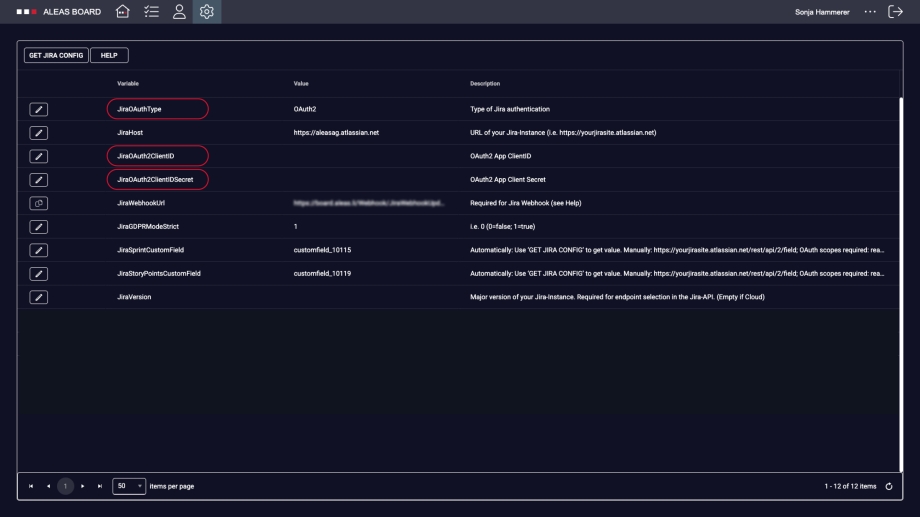
Step 7: Publish the Atlassian OAuth App (Distribution)
Finally, you need to publish the app you created so that all users in the organization can use Jira OAuth 2.
- Important: Set the distribution status to “Sharing”.
- Under vendor name, enter “ALEAS AG”.
- Please include a link to ALEAS AG’s Privacy Policy (aleas.li/datenschutz)
- Set the personal data declaration to “No.”
- Save all changes.
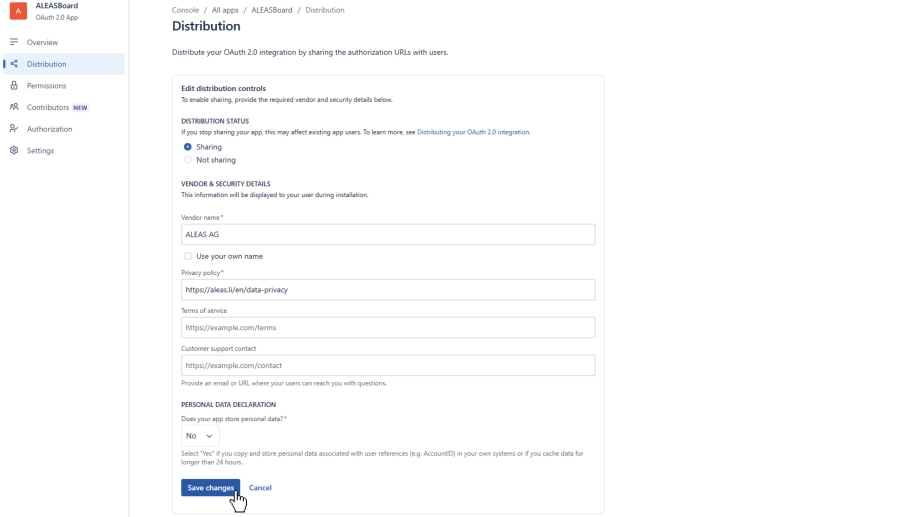
Step 8: Get Jira Configuration in ALEAS Board
Go to ALEAS Board and open the Jira settings (Dashboard → Settings → Jira).
Click the Get Jira Config button. A green “Configuration Successful” message should appear.
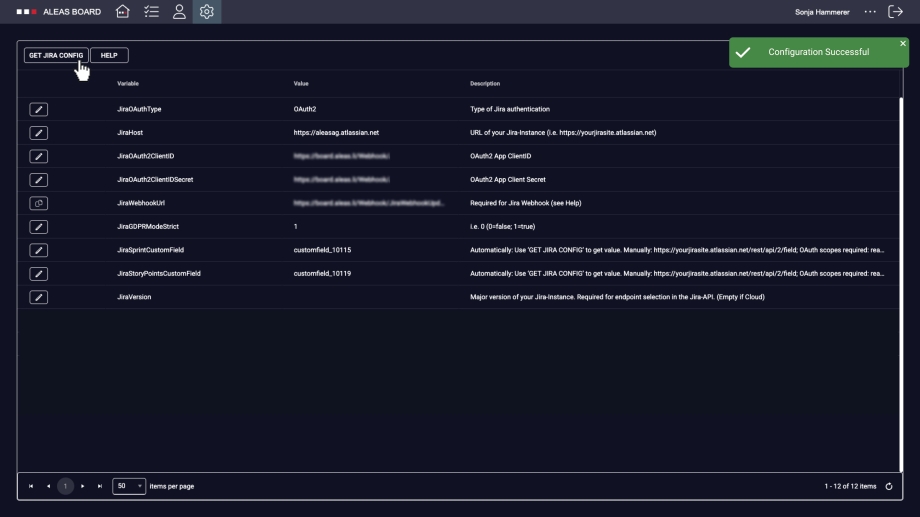
You may need to confirm access to Jira first. If the “Request Access” pop-up appears, make sure to select the correct JiraHost value in the Use app on* dropdown. (You can find the corresponding value in the JiraHost field on the ALEAS Board Admin page.)
Click Accept, then press the Get Jira Config button again.
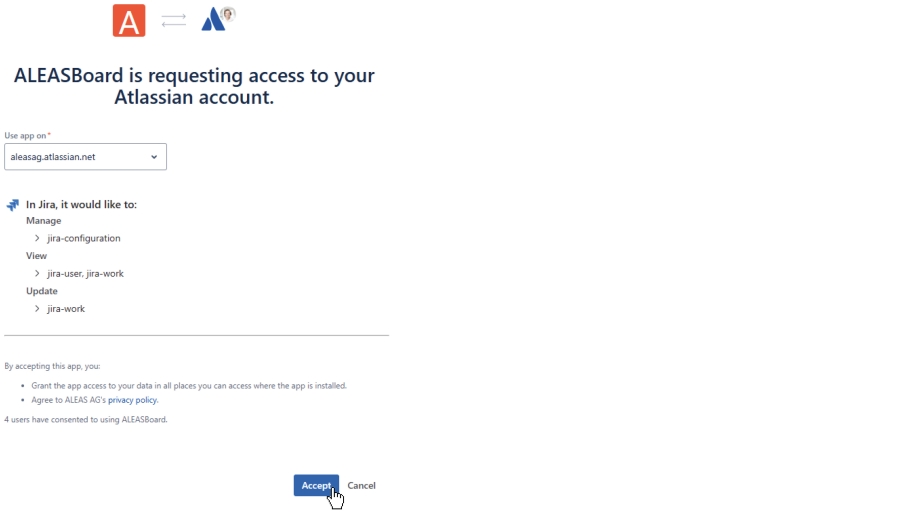
✅ The Jira Sync is now established, and the custom field settings should update instantly.
User Mapping
To set up the Jira integration, you may need to map your user first. Please note that only ALEAS Board Group Admins have the necessary permissions.
Go to Settings → Users, search for the user you want to map. (To search for a user, start typing their name and then select it from the dropdown list.)
Click on the Edit button, then under Jira User, select the corresponding Jira user name and save.